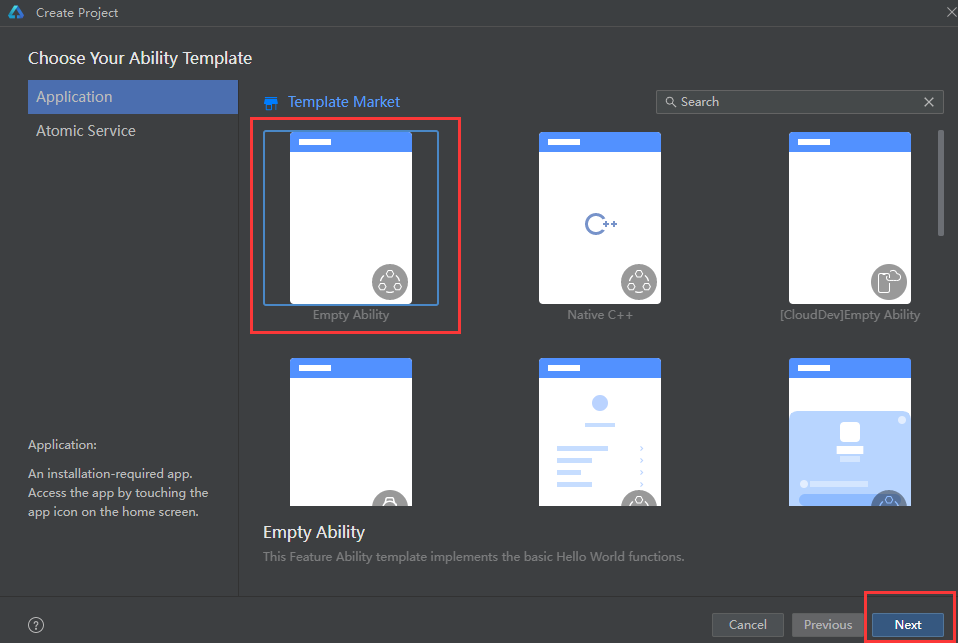
一、创建ArkTS工程
在菜单栏选择File > New > Create Project来创建一个新工程。选择Application应用开发,选择模板“Empty Ability”,点击Next进行下一步。

进入配置工程界面,Compile SDK选择“4.1.0(11)”,其他参数保持默认设置即可。其中Node用来配置当前工程运行的Node.js版本,可选择使用已有的Node.js或下载新的Node.js版本。

二、编写页面代码
在ets目录下的pages目录中创建Index.ets和Second.ets代码文件。 Index.ets文件源码:
import { router } from '@kit.ArkUI';import { BusinessError } from '@kit.BasicServicesKit';//Index.ets@Entry@Componentstruct Index {@State message: string = 'Hello World';build() {Row() {Column() {Text(this.message).fontSize(50).fontWeight(FontWeight.Bold)//添加按钮Button(){Text('Next').fontSize(30).fontWeight(FontWeight.Bolder)}.type(ButtonType.Capsule).margin({top: 20}).backgroundColor('#0D9FFB').width('40%').height('5%').onClick(() => {console.info('点击Next按钮')router.pushUrl({url:'pages/Second'}).then(() => {console.info('成功跳转到第2页')}).catch((err:BusinessError) => {console.error(`Failed to jump to the second page.Code is ${err.code}, message is ${err.message}`)})})}.width('100%')}.height('100%')}}
@Entry修饰符类似于java中的注解,被这个注解修饰的组件表示它是一个页面的入口。什么叫“页面的入口”?简单的说,它就是一个可以直接显示在设备上的页面。因为,ArkUI支持自定义组件,我们可以封装一些组件达到复用目的,在我们封装的这些组件中可能是一个页面一个局部,就类似于Android中的Fragment一样,Fragment是要依赖于Activity而存在的,并不能独立的直接显示在设备上。通过这样的类比可知,被@Entry修饰的组件就类似于Android中的Activity,除此之外的组件就类似于Android中的Fragment,例如被@Component修饰的组件。所以,被@Entry修饰的组件也要像Android中的Activity一样在AndroidManifest.xml文件中进行登记说明,只不过ArkUI中是在main_pages.json中进行登记说明。
@State是一个状态修饰符,ArkUI是基于MVVM模式的,通过数据的双向绑定来实现UI的更新。只要是被这个修饰符修饰过的变量的值在改变时都会触发build()方法的执行实现页面的刷新。
怎样设置指定的页面为第一个启动页面呢?方法:找到路径ets/entryability/下的EntryAbility.ets文件即可修改。详见下图:

Second.ets源码文件:
import { router } from '@kit.ArkUI'import { BusinessError } from '@kit.BasicServicesKit'@Entry@Componentstruct Second{@State message: string = 'Hi there'build() {Row(){Column(){Text(this.message).fontSize(50).fontWeight(FontWeight.Bold)Button(){Text('Back').fontSize(30).fontWeight(FontWeight.Bold)}.type(ButtonType.Capsule).backgroundColor('#0D9FFB').width('40%').height('5%').onClick(() => {console.info('点击了返回键')try {router.back()console.info('成功返回第1页')} catch (err) {let code = (err as BusinessError).code;let message = (err as BusinessError).message;console.error(`Failed to return to the first page.Code is ${code}, message is ${message}`)}})}.width('100%')}.height('100%')}}
在entry > src > main > resources > base > profile目录中的main_pages.json文件中配置页面路由信息,如下:
{"src": ["pages/Index","pages/Second"]}
三、最后,真机运行截图如下:

